


Plastic is everywhere: from the everyday items we use to the cars we drive, plastic plays a pivotal role in our daily lives. But have you ever wondered how different plastic parts are joined together to create these products?
In this blog post, we’ll delve into the basics of plastic welding, its various methods, and its significance in the manufacturing world. Whether you’re a curious reader or someone in the industry, this guide will shed light on a process that’s as fascinating as it is essential.
What is Plastic Welding?
Plastic welding is a technique used to join pieces of plastic together. The process is similar to metal welding, but instead of melting metal, plastic welding melts the plastic to create a bond. The basic idea is to use heat and sometimes pressure to melt the plastic surfaces and then join them together. When the melted plastic cools and solidifies, you get a fused joint.
What is an Example of Plastic Welding?
You may not realize it, but you’re surrounded by things created by plastic welding. From vinyl siding to disposable cutlery, to medical equipment, to pool toys, plastic welding is responsible for an abundance of things in our everyday lives. We might not have things like artificial joints, sewing machines, electrical cable insulation, or plastic containers if it weren’t for plastic welding.
Three Main Steps in Plastic Welding
There are three main steps for a good join between thermoplastics, which are pressing, heating, and cooling.
Step One: Pressing
- Purpose: Ensure that the plastic pieces are in close contact, facilitating effective heat transfer and fusion.
- Process: The plastic parts to be joined are pressed together, either manually or using a machine. This ensures that there are minimal gaps or air pockets between the surfaces, which could compromise the weld’s strength.
- Significance: Proper pressing is crucial as it sets the stage for the subsequent steps. A well-pressed joint ensures that the heat is uniformly distributed, leading to a more consistent and stronger weld.
Step Two: Heating
- Purpose: Melt the plastic surfaces to be joined.
- Process: Depending on the welding method, various heat sources like hot air, ultrasonic vibrations, lasers, or friction are applied. This heat causes the plastic’s molecular chains to become mobile, allowing them to intertwine with the chains of the adjoining piece.
- Significance: Proper heating is the heart of the welding process. It ensures that the plastic materials fuse effectively. Too little heat, and the bond won’t form; too much, and the plastic might degrade or burn.
Step Three: Cooling
- Purpose: Solidifies the joint, ensuring the plastic pieces are firmly bonded.
- Process: After the heating phase, the melted plastic is allowed to cool, either naturally or with the aid of cooling mechanisms. As it cools, the plastic’s molecular chains solidify, locking the pieces together.
- Significance: Cooling is vital for the stability and strength of the weld. A controlled cooling process ensures that the joint is durable and resistant to external stresses.
Methods of Plastic Welds
There are several methods of plastic welding, which are primarily differentiated by their heating methods, and all processes are divided into two general categories of internal and external heating.
The most common methods of plastic welding are the following:
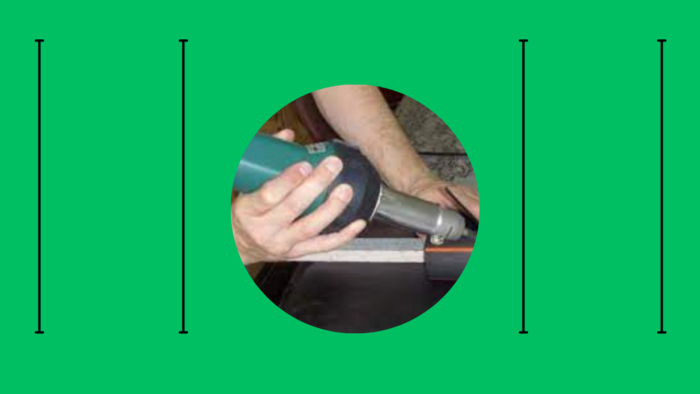
Hot Air Welding
Hot air welding is also known as hot gas welding and is a process that utilizes the heat of hot gas, usually air that has been heated by electric heating elements in the heat gun. A specifically developed welding gun generates very hot air using a feed just for plastic, which enables the various components to melt and then join together.
Ultrasonic Welding
Ultrasonic plastic welding is the joining or re-forming of thermoplastics through the use of heat generated from high-frequency acoustic vibration. This process is accomplished by converting high-frequency electrical energy into high-frequency mechanical motion.
The mechanical motion, combined with the applied force, generates frictional heat at the joining points. This heat leads to the formation of a molecular bond between the parts. Typically, the weld times range from one-tenth to two seconds.
Radio Frequency Welding
Radio frequency welding is similar to ultrasonic welding, but instead of using acoustic vibrations, it uses high-frequency electrical energy (radio waves). It’s a preferred method for welding thin plastics and has a weld time of two to five seconds.
Spin Welding
The spin welding process consists of two parts brought together by friction from the rotation of one part at high velocity while the other part remains stationary. Friction between the two parts causes melting, fusing the pieces together. The weld time is typically one-half to five seconds.
Vibration Welding
The vibration welding process — also known as friction welding — is when parts are rubbed together at a certain frequency and amplitude, causing friction and generating heat. The heat melts the plastic in the joint region, fusing the pieces together. The weld time is typically one to five seconds.
Laser Welding
In the laser welding method, two parts are pressed together, and a laser beam moves along the joining line. Once the plastic solidifies, it creates a permanent bond. The weld time is typically three to five seconds.
Hot Plate Welding
Also known as Butt welding, hot plate welding applies heat from a hot plate placed between the plastic surfaces that need bonding. The two plastic surfaces are either pressed against the hot plate, which is made of aluminum alloys, or held next to it for some time. Then the hot plate is removed and the parts are pressed together to form the weld. Typical welding time is ten to twenty seconds.
Contact Welding
In contact welding, the heat is supplied with thermal conduction. The plastic components being welded are put together, and hot tips pinch them, melt, and join them all together.
Automatic Welding
Automatic welding is a chosen process to manual welding. These plastic welding machines remove the manual process that takes years, training, and a specialist to actually do the welding.
Benefits of Plastic Welding
Plastic welding offers several advantages over other joining methods. Unlike adhesive joining, which can be messy due to the use of consumables, plastic welding typically doesn’t require any.
Additionally, there’s no need for intensive surface preparation, a step often necessary with adhesives. A plastic weld is not only permanent, in contrast to some mechanical fasteners and adhesives, but it’s also lightweight. Furthermore, it ensures a leak-tight and airtight seal.
Hot Air Welding Advantages
- Flexible, can be applied to most part geometries
- Can be very inexpensive
- Strong welds if parent material is cleaned and preheated
Ultrasonic Welding Advantages
- Very fast process (typically < 1 second)
- Advanced, modern equipment with sophisticated control and monitoring features
- Economical
Radio Frequency Welding Advantages
- High energy efficiency
- Bonds films or thin sheets with complex circumference geometry
Spin Welding Advantages
- Very fast process (typically < 1 second)
- Advanced, modern equipment with sophisticated control and monitoring features
- Economical
Vibration Welding Advantages
- Applicable to large parts
- Internal walls can be welded
- Well-established process with excellent control possible
Laser Welding Advantages
- Very clean process, little to no weld flash
- Precise control / selective heating
- Works with simple joint designs (uniform contact of mating surfaces)
Hot Plate Welding Advantages
- Simple and reliable
- Suitable complex part geometries, even in the joining plane
- Can be adapted for use with materials which have different melting temperatures and melt viscosities
- Relatively high tolerance to imperfections on the mating surfaces
Tips for Welding Plastics
When joining two plastics together, a key component is the type of plastic to be heated and joined. It is essential to weld like-plastic with like-plastic, such as polypropylene to polypropylene, polyurethane to polyurethane, or polyethylene to polyethylene.
Once you’re sure that you have like-plastics, you’re ready to begin welding. Below are some tips to help you get ready to weld.
- Work in a well-ventilated area and use heat-resistant gloves and long-sleeved clothing for protection.
- Although plastic welding doesn’t give off a harmful light, it’s recommended to wear a welding visor, which can be clear.
- Clean the plastic with soap and water, or if needed, with a cleaning solvent like MEK (methyl ethyl ketone). Ensure to remove all debris and dry plastic with a lint-free cloth. If your plastic has paint on it, remove the paint with 80-grit sandpaper — but be careful not to scratch the plastic!
- Double-check what type of plastic it is that you’re welding. Usually, this can be found as letters on the plastic, such as PE (polyethylene), PP (polypropylene), or PVC (polyvinyl chloride).
- Then choose a welding rod that matches that type of plastic. If you can’t determine what type of plastic you have, you can get a welding rod testing kit (found at most hardware stores). These come with different types of plastic welding rods and instructions on how to determine which rod will work for your plastic.
- Hold the pieces of plastic together with a clamp and tape and form the joint before you turn on the torch.
- Ensure to secure the joints tightly and in the correct position because you don’t want to worry about having to adjust them while you’re welding.
- Pre-heat the welding gun for at least 2 minutes.
Instructional Tips to Start Welding
- Secure the plastic together by tack welding the ends.
- Using a tacking nozzle, run the tip along the weld line to slightly melt the two plastics together.
- This closes up the joint interface and prevents the plastics from shifting during the welding process.
- Trim the end of the welding rod using angle cutting pliers. By doing so, you’re increasing your chances of getting a very smooth weld without any plastic bubbling.
- Insert the welding rod into a speed nozzle on your welding gun.
- Move the tip of your welding gun over the plastic, touching just the edge of the nozzle to the plastic. Heat until you see the plastic begin to melt.
- Be consistent in terms of pressure and pace.
- Move at a steady, deliberate pace so you can melt the plastic just enough to bind them without burning them.
- Upon completion of your weld, wait at least 5 minutes for the plastic to cool.
What to Consider When Welding Plastics?
There are several things to consider when welding plastics. Let’s take a look at considerations for the heat, the welding rod, the welding gun, and the welding kit.
The Heat
Likely, you’ll need the temperature within the range of 200 and 300 °C (392 and 572 °F). Below or above that range will result in not melting enough or burning the plastic. Ensure to know what temperature you need based on what type of plastic you are welding.
The Welding Rod
It’s crucial that the welding rod is the same material as the plastic to be welded and to ensure the end of the welding rod has been trimmed so that it’s in pencil-point form.
The Welding Gun
Manual (hand-held) welding tools are used for small fabrication work, detailed projects, and repair work, and should not be used for thicknesses beyond 10mm. For larger fabrications, use extrusion welding tools.
A Welding Kit
For beginners, plastic welding kits are a great option because they are fully equipped with what you need for most repairs. Kits come with a welder, varying welder rods, welding tips, and a guide to help you through your welding process.
Types of Plastic Welding Seams
Plastic welds have a similar appearance to metal welds, and therefore, many of the same welding techniques are used.
Below are the six most common types of plastic welds.
Fillet Weld
The fillet weld is one of the most frequently-use seam geometries. It’s produced by welding two workpieces that meet in a T-joint.
Interior Corner Seam
Interior corner seams are generally used on difficult-to-reach locations. Free forms and spline-shaped weld seam geometries are welded most efficiently like this.
Corner Seam Appearance
The outer corner seam is a fillet weld in which the weld seam runs along the edge of the workpieces which are standing together. Consequently, the weld is made along the outer longitudinal side (edge).
X-Seam
The double-V seam is also known as an X-seam. It is a type of butt weld and consists of a combination of two V-seams on each of the two sides of the components to be joined.
V-Seam
To achieve the V-shaped angle that is typical for the V-seam, the workpieces are either beveled or positioned at an appropriate angle to each other.
Lap Seam
Lap seams are mainly used for plastic sheets. The sheets are arranged on top of each other, and the weld seam is laid on the upper exposed material edge.
Learn More About Plastic Welding With Hot Air Tools®
Having a handy plastic welder to help quickly and easily repair damaged plastic can come in handy. Maybe you need to fix your cracked kayak, your broken sunglasses, your vehicle’s plastic molding, or even your child’s plastic toy. Whatever the application, a quality plastic welder or plastic welding kit can make you a hero!
At Hot Air Tools®, our goal is to help you in the decision process so you can buy the best plastic welding tools for your needs — even if it’s from a competitor. We strive to provide you with useful how-to guides and other online resources that give you tips on how to have the best plastic welding experience possible. Contact us today to learn more about all things plastic welding!