


If you’ve ever tried fixing a broken plastic item, you know that regular glue sometimes just doesn’t cut it. That’s where plastic welding comes in. Of course, since hot air welding is a melting process, you will need heat — lots of it. This is why the heat gun is one of the most effective tools in plastic welding.
In this guide, you’ll learn everything you need to know about repairing plastic with a heat gun. From picking the best heat gun to figuring out the best temperature for different plastics, here’s how to safely use a heat gun for plastic welding.
What Temperature Do You Heat Gun Plastic?
The answer varies depending on the type of plastic. Softer plastics like polyethylene require a lower temperature, typically around 300°F. More robust plastics like ABS can withstand higher temperatures, around 500°F.
It’s essential to start at a lower temperature and gradually increase it until the plastic begins to melt without burning. Always refer to the manufacturer’s guidelines for the specific plastic you’re working with to avoid damaging the material. To be sure you have the right temperature, test the heat gun on a small piece of plastic first.
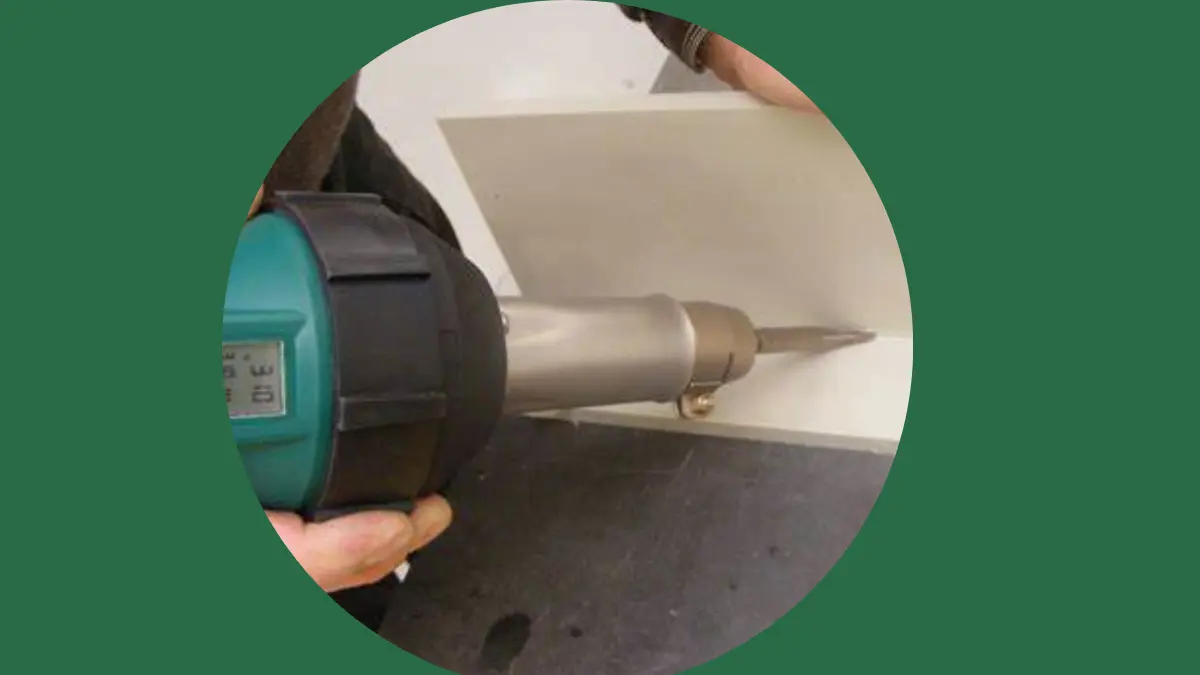
How Many Heat Settings Are There?
Basic heat gun models usually have 2-3 fixed heat settings. However, on more advanced professional heat guns, there is an option to control a range of temperatures. You can usually choose the exact temperature you want by using a dial.
Also, temperature scanners could be fitted to a heat gun. The heat gun gauges the heat produced by the tool, but a temperature scanner can tell you the exact temperature at the point the hot air contacts the object being heated.
How Do You Repair Plastic with a Heat Gun?
Repairing plastic with a heat gun involves a few key steps. First, clean the plastic surface of any debris or grease. If the plastic surfaces have any rough edges, it’s a good idea to trim them with a sharp blade before welding. This helps ensure the plastic weld is strong and long-lasting.
Next, set your heat gun to the appropriate temperature for the type of plastic you are repairing. Begin by gently heating the edges of the broken pieces, taking care not to overheat or warp the material. Once the edges are pliable, join them together, applying gentle pressure to ensure a strong bond. For added strength, you can use a plastic welding rod of the same material.
Allow the repair to cool and solidify completely before handling the item. With patience and the right technique, you can effectively repair various plastic items, extending their lifespan and functionality.
Plastic Welding Tips
Hold the heat gun about an inch away from the plastic and move it slowly and evenly over the area you want to weld. As you apply heat, the plastic will melt and become pliable. Make sure to move the heat gun evenly across the plastic surface so that it melts evenly and you get a consistent weld. Feel free to adjust your technique as you observe how the material reacts to your inputs.
After the plastic has cooled and hardened, trim any excess plastic or rough edges with a blade or sandpaper. If your heat gun has a fan-only function, you can manually cool it down by blowing cool air on the affected area. This will give your plastic welding project a clean and polished finish. You can also use a plastic adhesive to strengthen the weld further and ensure it lasts the test of time.
Finding the Best Heat Gun for Plastic Welding
Ideally, you want a heat gun that offers a balance of power, precision, and safety. Look for a hot air heater with adjustable temperature settings, allowing you to tailor the heat output to the specific type of plastic you’re working with. Additionally, ergonomic design and safety features like automatic shut-off can make your welding process both comfortable and safe.
You should also look for thermal processing equipment with a good plastic welding nozzle that allows for precise heating and a comfortable grip that you can hold for extended periods. This helps make your application more accurate.
Staying Safe When Using a Heat Gun
With anything that produces hot air at high temperatures, caution is needed when using a heat gun. Here are a few ways to help you minimize risk:
- Avoid obstructing the heat gun’s air inlet grills:If the grills are obstructed, the heat gun can overheat.
- Avoid using the heat gun around flammable materials: Flammable and combustible materials are liable to ignite if touched by a heat gun.
- Remain in a ventilated environment: When using a heat gun, there’s the possibility of accumulating fumes. Speaking of fumes, stay away from using heat on lead-based paint because that will definitely release toxic fumes.
- Don’t point the heat gun at just one spot: Never keep the heat pointed at just one area, especially if you’re drying things like wood, because scorching or fire could occur. Use circular motions instead.
- Allow the heat gun to cool: Once you’re finished using it, leave it to cool before putting it back into storage. Ensure to place it on a heatproof mat or stand to prevent anything from touching the hot parts of the tool.
Find the Best Heat Gun for Plastic Welding
Hot Air Tools® is home to the best plastic welding tools and hot air hand tools on the market. We’re not just about selling tools; we’re passionate about providing resources to help you make an informed purchase decision.
Whether you’re a seasoned pro or just starting out, we’re here to support your plastic welding journey every step of the way. Contact us today to learn more!